
This project was part of a class project for a engineering software development class at BYU.
Introduction
I designed and developed a simple video game in C++ called CubeCombat to fulfill the requirements for a software design class at BYU.
The purpose of this project was to demonstrate (and practice)
- Writing clean code (in terms of style and C++ best practices)
- Test-driven development
- Using graphics libraries for scientific visualization
- C++
See the source code on GitHub. Below, I describe how I implemented the above principles.
Clean code
Code should be readable without needing comments. To achieve this, this project uses
- Descriptive variable names: Names describe what value the variable holds.
- Descriptive function names: Names describe exactly what the function does.
- Maintaining readability with small(ish)-sized functions: While I don’t have a hard requirement on the max number of lines a function should be, functions are small so they are understandable.
- Single responsibility principle: As much as possible, functions and classes have one purpose.
- Clarifying intent with const keyword: If function or parameter is not meant to be modified, it is declared const.
Test-driven development
Unit tests help certify a codebase and protect its functionality when refactoring or making changes. It guarantees that the code has the set of features described by its unit tests.
In this project, I used the following workflow:
- Define a feature I wanted to add
- Stub out the feature/class to know what the public functions would look like
- Write a test
- Implement function to pass test
- Refactor if needed
- Repeat 3-5 with more tests
Note that sometimes I did the steps backwards, depending on the feature I was implementing. In other words, I implemented a function/feature and then went back and wrote tests.
Graphics libraries
I used the Visualization Toolkit (VTK) to visualize the arena and the agents. I used Qt6 to design the user interfaces and windows.
My game code was implemented as a C++ library separate from all graphics-related code. This will enable me to easily switch graphics libraries in the future if I ever need to.
C++
This project was done entirely in C++ and provided a great opportunity to strengthen my C++. See the source code on GitHub.
Project description - CubeCombat
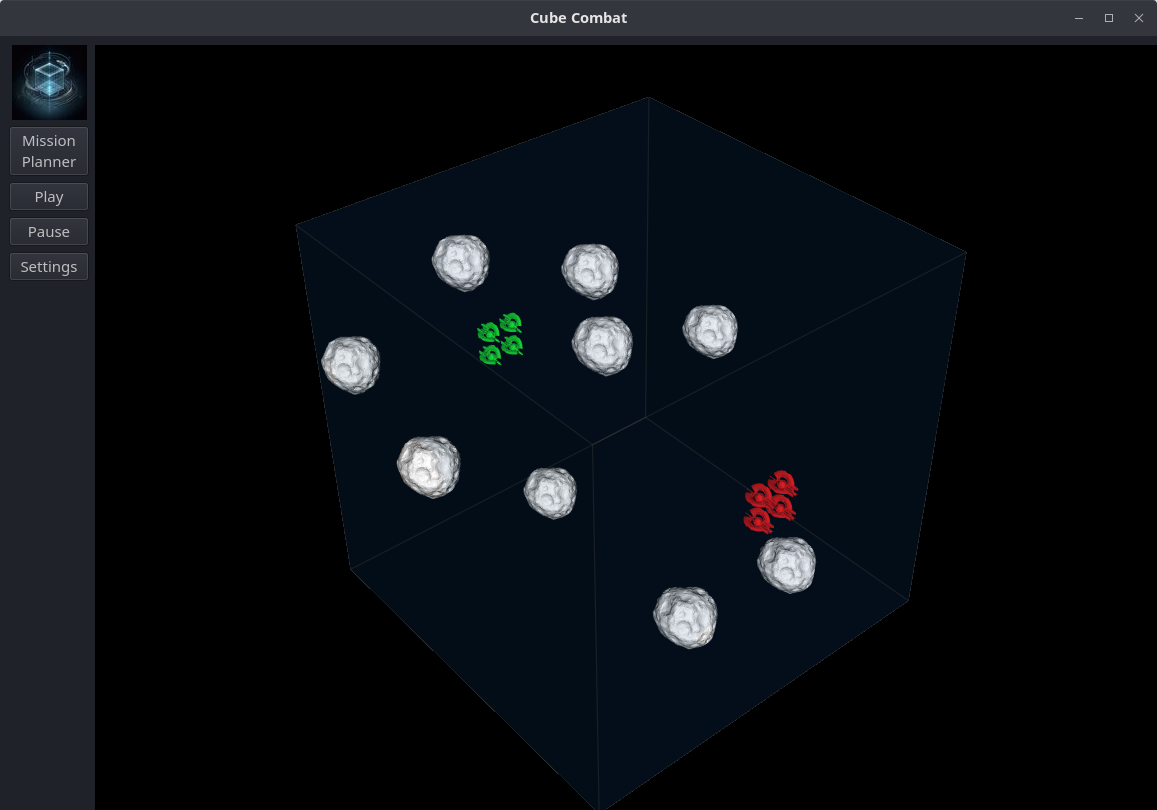
CubeCombat is a (semi) real-time strategy game based loosely on the game played in the Battle School from the Ender’s Game novel. The goal of the player is to eliminate or freeze all the opposing players’ agents by shooting them with their agents.
Play takes place in a large cube–the arena–where all agents in a team start lined up in formation along walls. Stars are randomly scattered throughout the arena. These stars can be used to plan paths through the arena to track down and neutralize enemy agents.
This project was completed over roughly two months’ time.
Gameplay
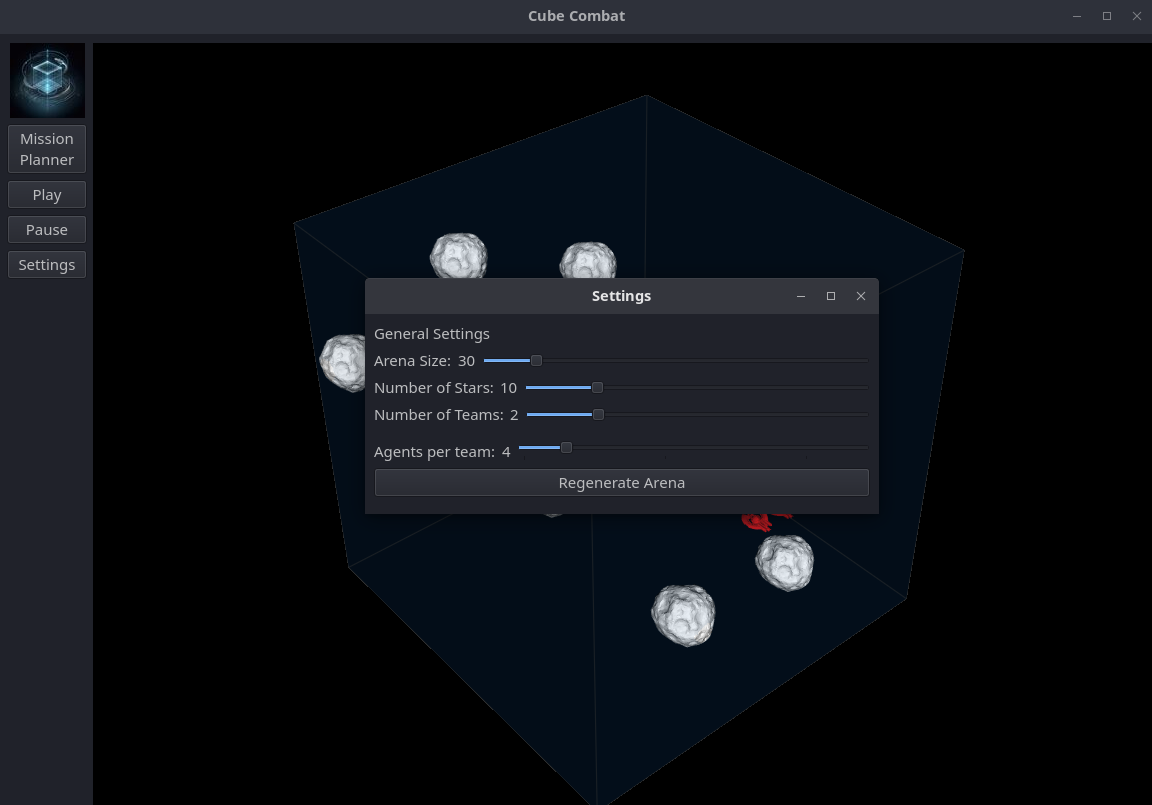
Step 1: Players first customize the scenario by changing the number of teams, the number of agents per team, the size of the arena, and the number of stars in the arena.
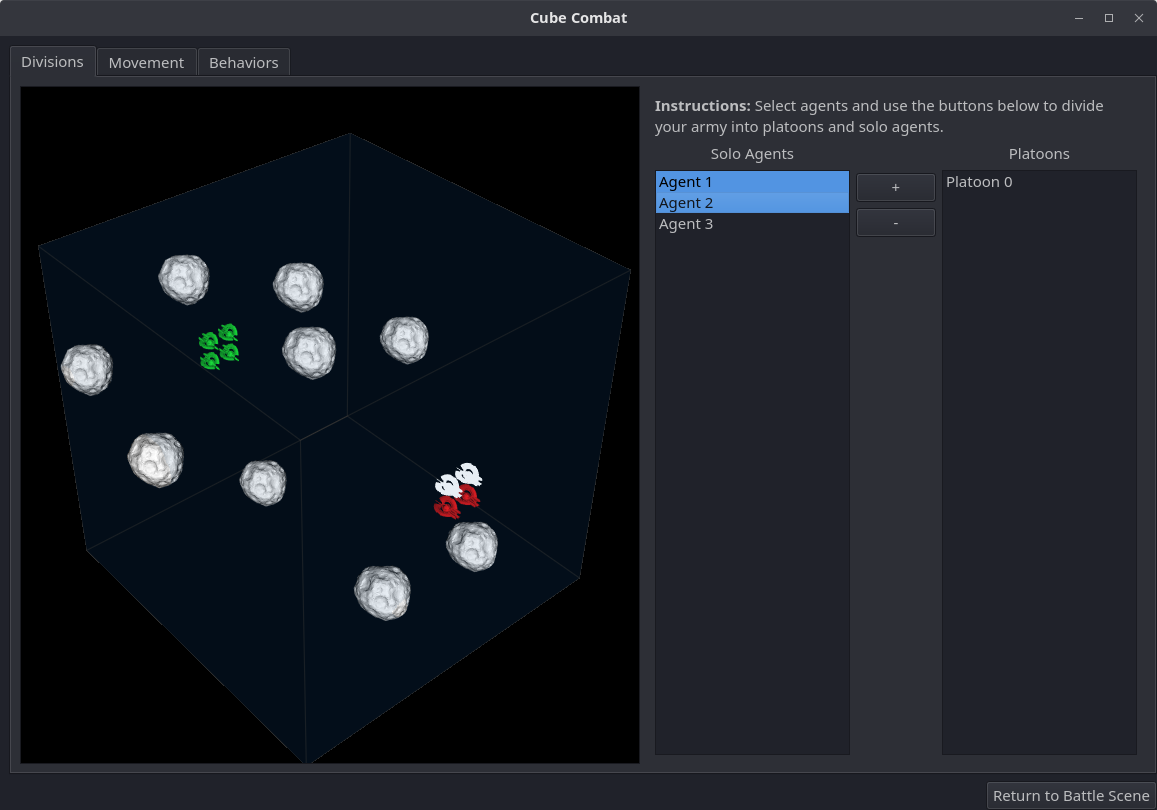
Step 2: Players then navigate to the Mission Planner. On the Divisions tab, they can optionally group their agents into platoons, or leave them as solo agents. Every agent in a platoon will have the same planned path, so it is a way to group forces and coordinate movement.
Step 3: Next, players navigate to the Movement tab in the Mission Planner. Here, players can add sequences of positions to the planned path for each platoon or solo agent.
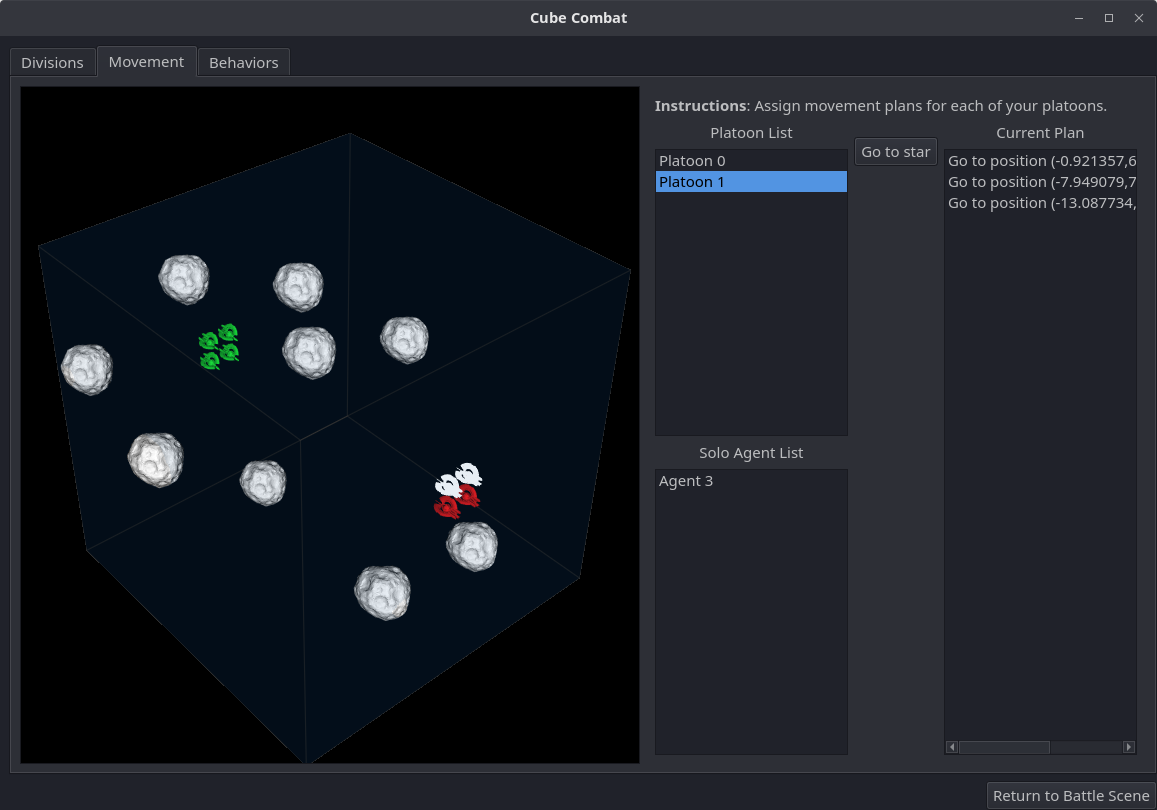
To do this, players
- Select one or more platoons or one or more solo agents in the list
-
Click the “Go to star” button. The stars in the arena viewport will turn red to indicate that they can be selected.
- Select a star in the arena viewport to add that position to the planned path.
After doing this, the stars will be deselected and the new position will be added to the planned path in the right-hand list view. Players can add as many positions to a planned path as they want. Additionally, other agents’ positions can be selected. Also note that the Movement tab will be available during gameplay (to replan paths as necessary).
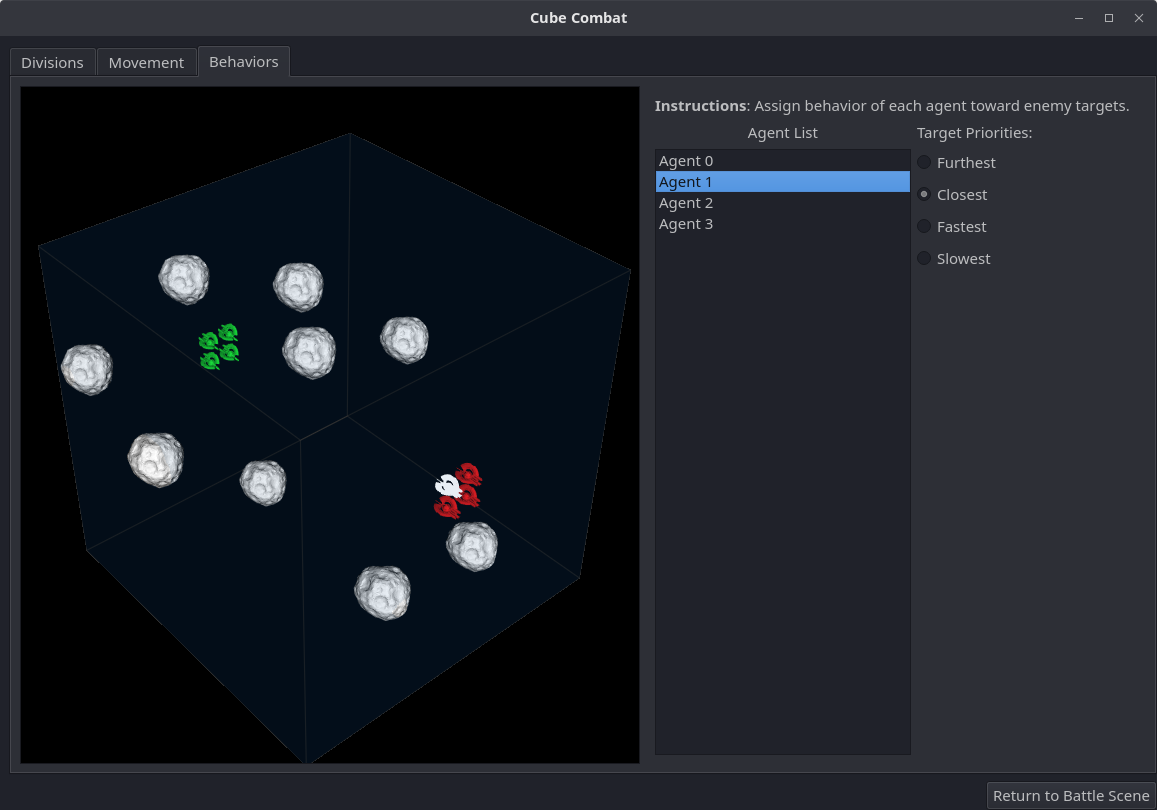
Step 4: After planning paths, users can finally select target behavior for each agent in the Behaviors tab. Players can assign agents to prioritize shooting at the closest, furthest, fastest, or slowest targets within their viewing range. Target behaviors add a little more strategy to the game, especially for agents travelling in platoons, since players can customize the target behavior for each agent in the platoon.
Finally, players can return to the main window and start the game. While the game is running, players are free to reorganize platoons, add to planned missions, or customize target behavior as desired.
Gameplay continues until one team remains unfrozen.
Some implementation details
Here are some of the things I implemented:
- Rigid-body dynamics (integration uses simple Euler step)
- Position, velocity, orientation PID controllers
- Potential fields-based collision avoidance controller
- Collisions with other agents, stars, and arena walls (spherical collisions)